> For the complete documentation index, see [llms.txt](https://docs.timeinpixels.com/llms.txt). Markdown versions of documentation pages are available by appending `.md` to page URLs; this page is available as [Markdown](https://docs.timeinpixels.com/nobe-omniscope/scopes/skintone-scope.md).

# Skintone Scope

## Overview

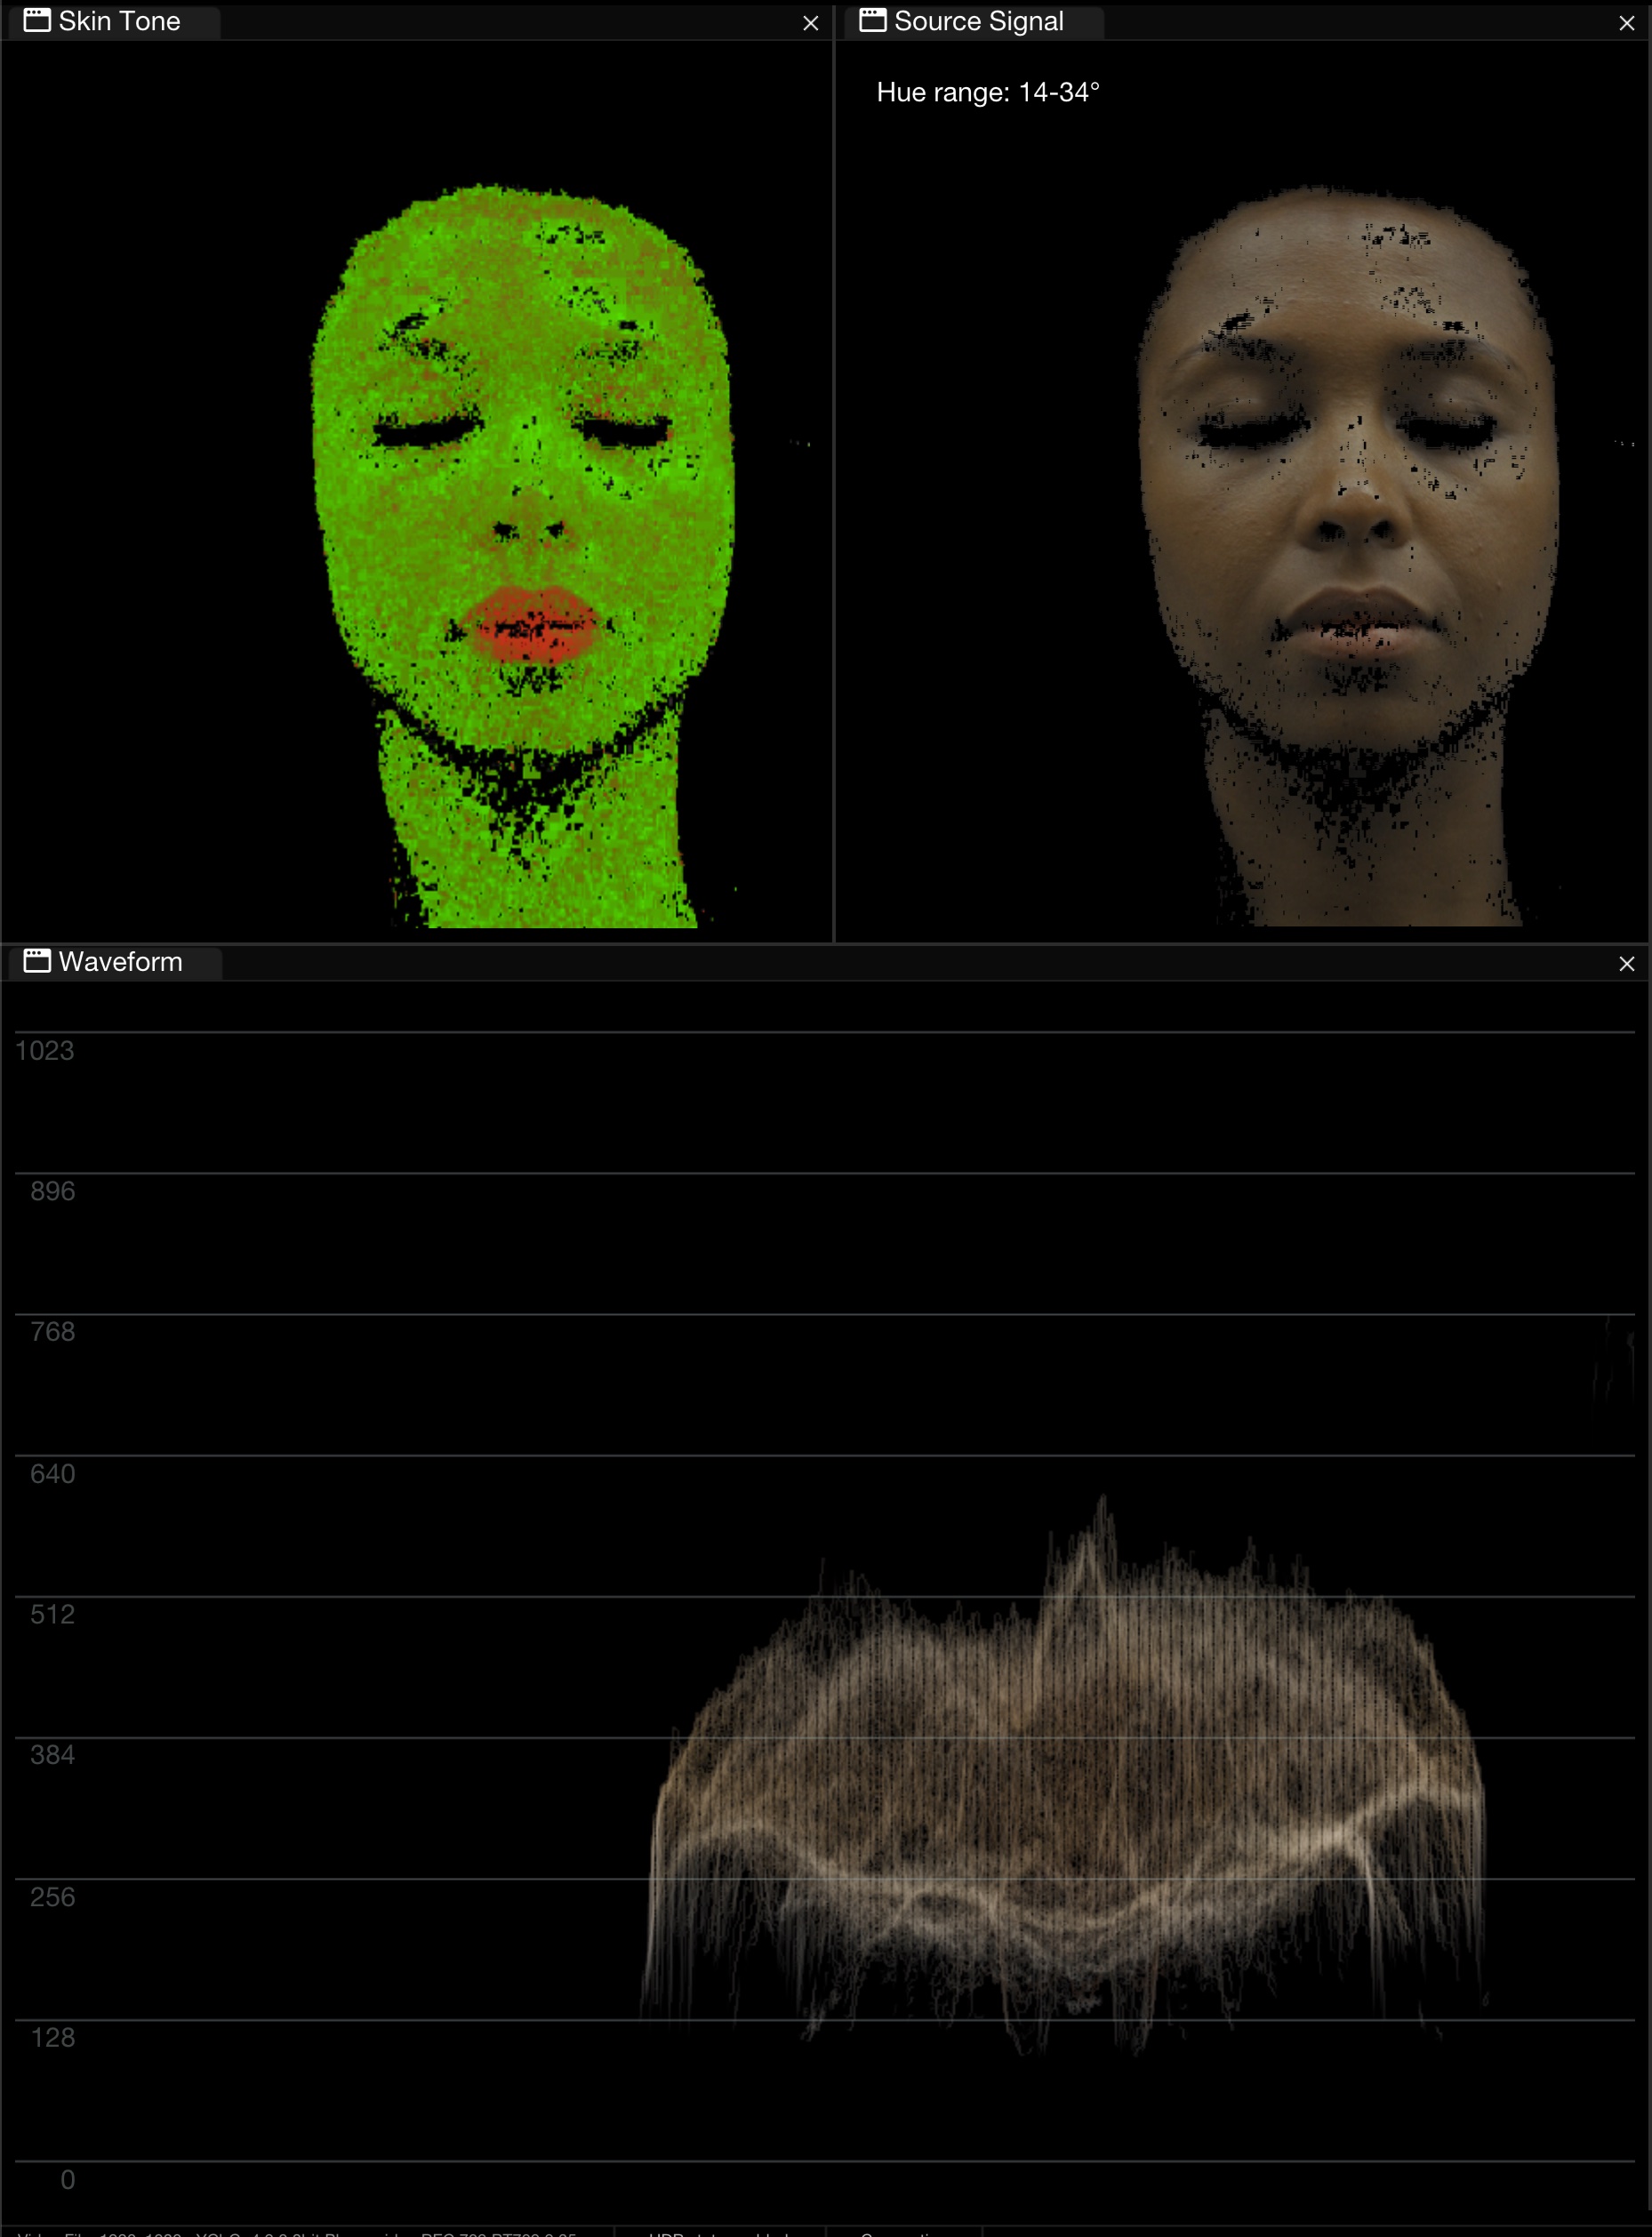
The SkinTone Scope is a specialized tool for monitoring skin tones. It creates a color qualifier targeting only the skin tone range, offering precision in color grading.

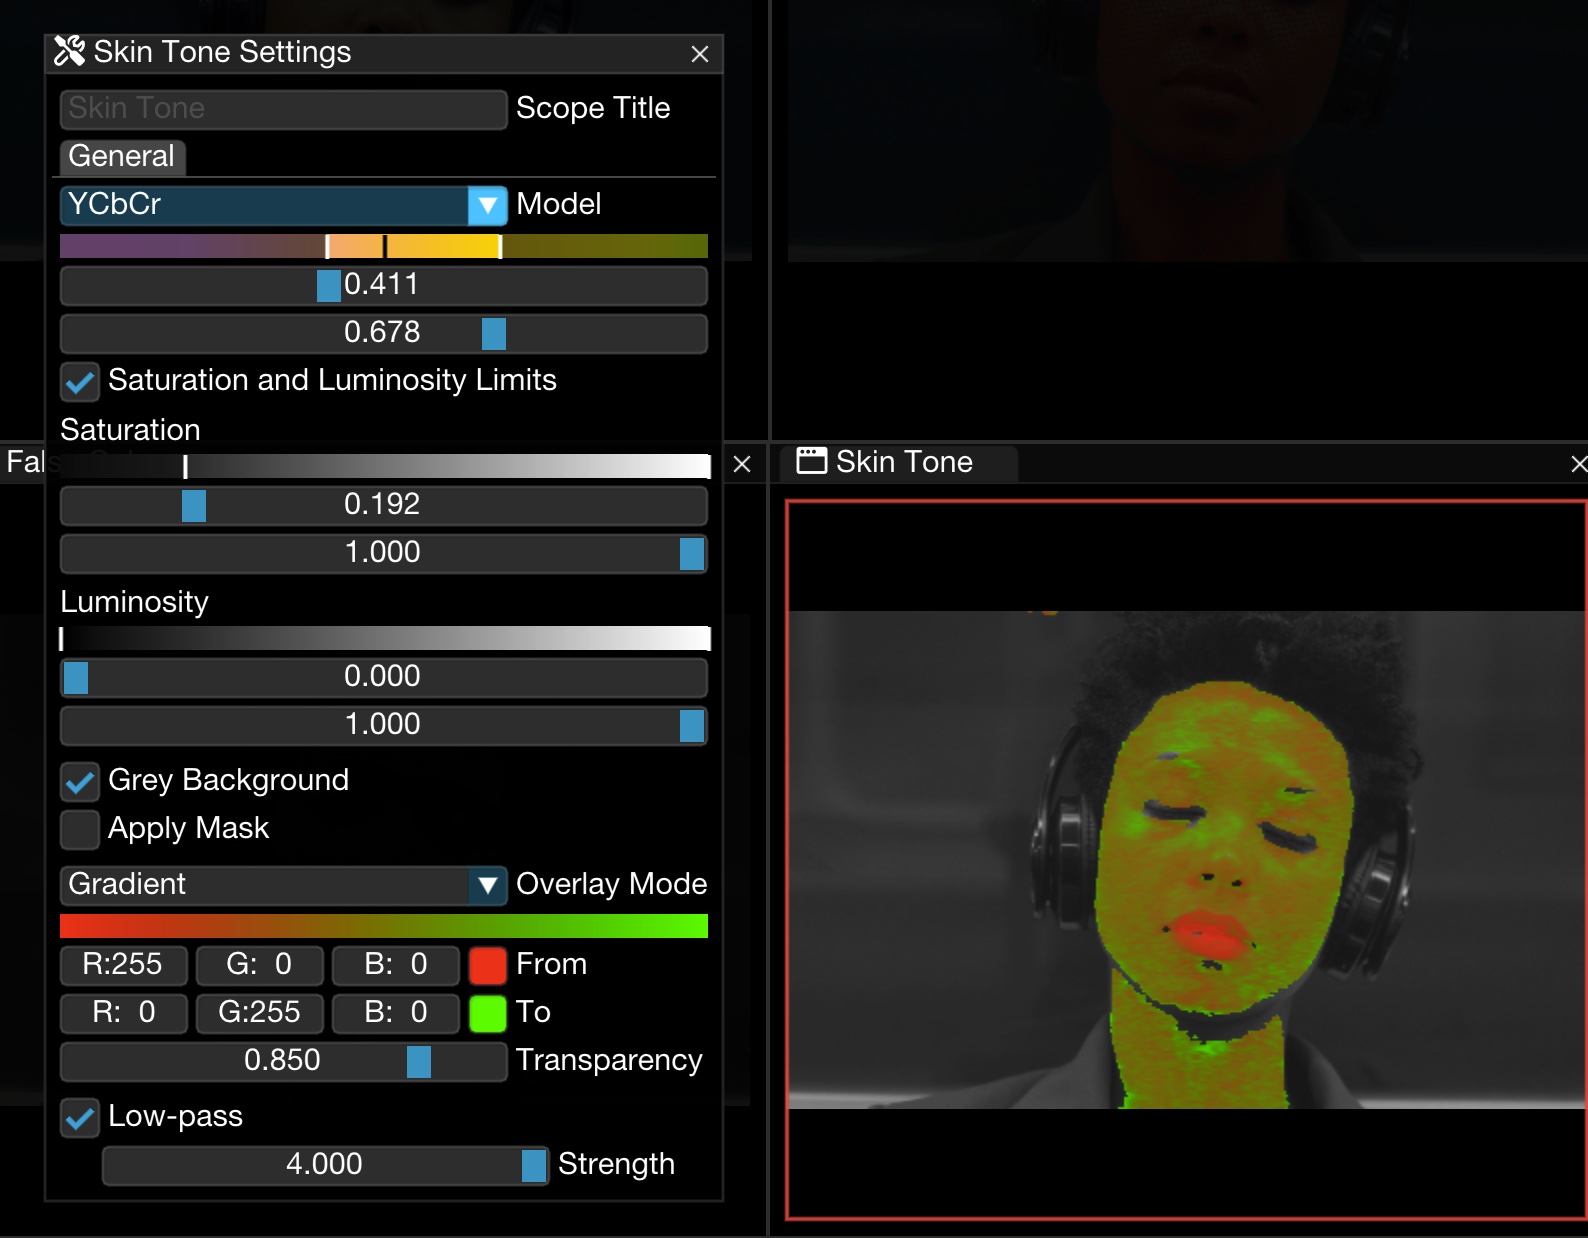
<figure><img src="/files/kTTtIDd1rrZMFiRdUP7m" alt=""><figcaption><p>SkinTone Scope settings</p></figcaption></figure>

## Color Models

The SkinTone Scope features two colour models:

* **HSV** (Hue, Saturation, Value) — Ideal for intuitive adjustments because it separates colour (hue) from the non-colour brightness channel (value).
* **Y'CbCr** (Luma, Blue-Difference Chroma, Red-Difference Chroma) — Suited for broadcast workflows, working directly on the signal's luma (Y') and colour-difference (Cb, Cr) components. Note that Y' is luma, not scene luminance — it's computed from the non-linear R'G'B' signal.

### Hue detection range

In the hue-based model, the Hue Detection slider is a normalized control over a limited skin-tone hue window, not the full 0–360° hue wheel. The 0.0 to 1.0 slider range maps to a 144° span around the red/skin-tone region:

```
hue angle = (144 × slider value - 72) mod 360
```

This means:

```
0.00 = 288°
0.25 = 324°
0.50 =   0° / 360°
0.75 =  36°
1.00 =  72°
```

The default Hue Detection bounds of 0.42 to 0.70 represent approximately 348.5° to 28.8°, wrapping through 0°.

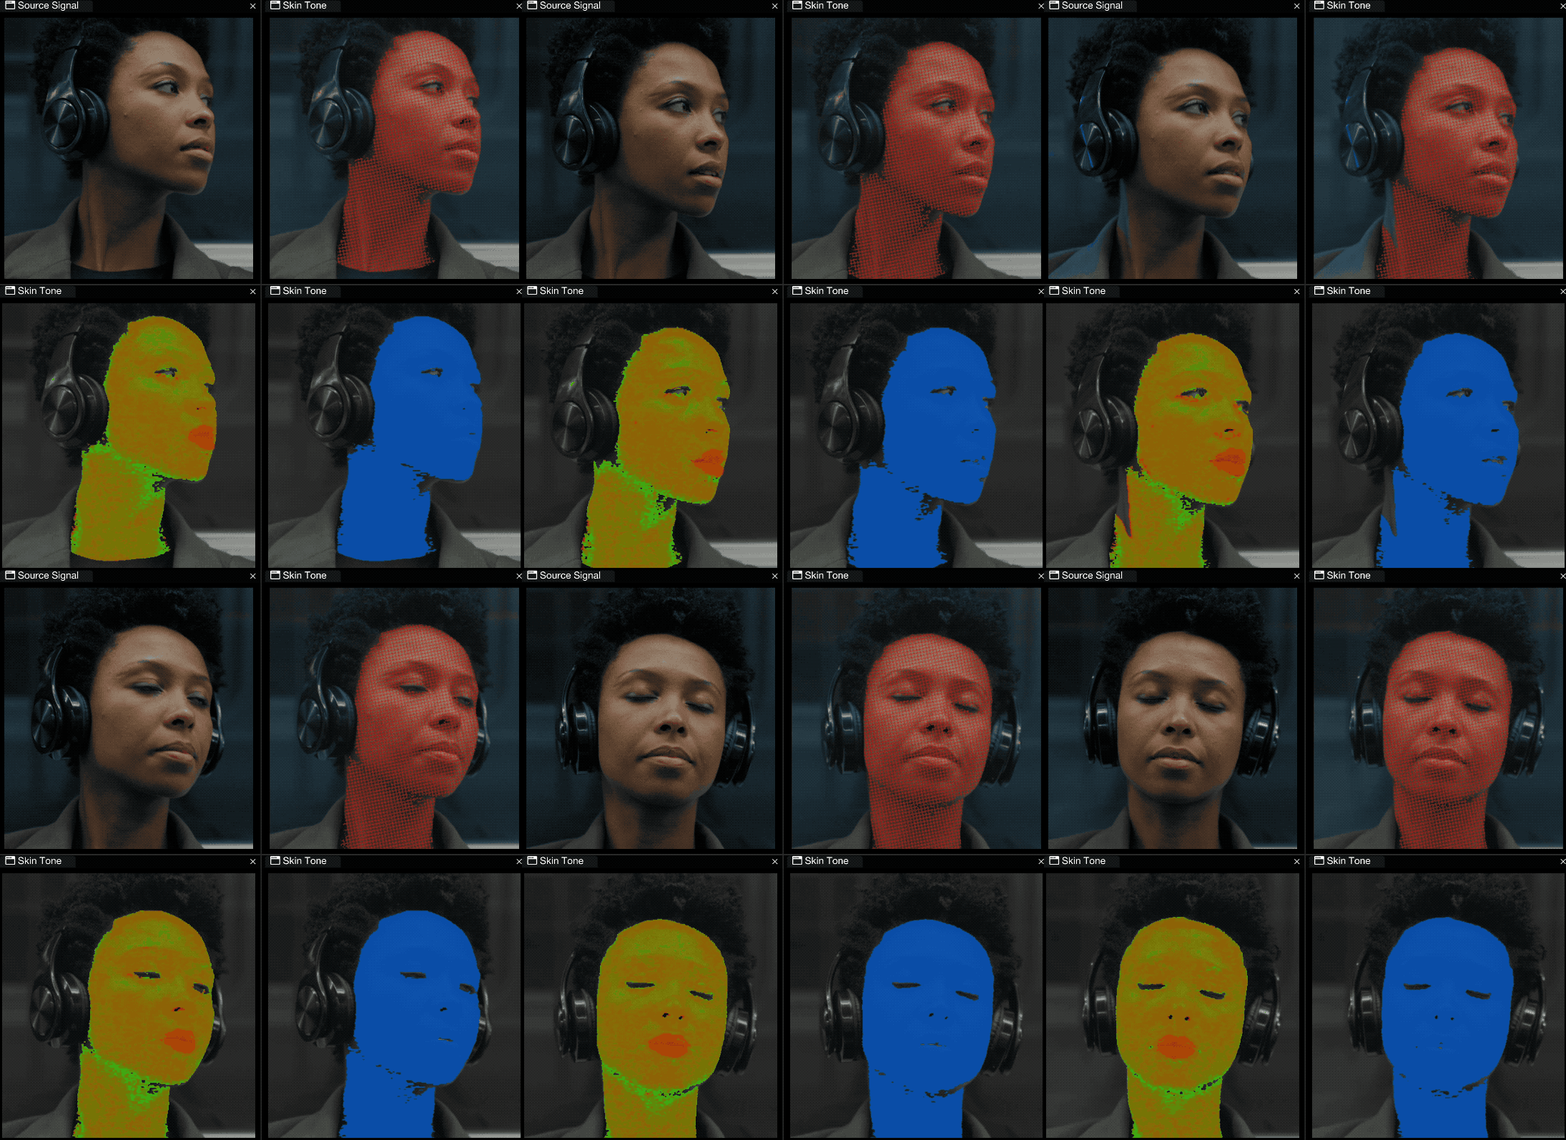
<figure><img src="/files/CKGUIN6pVmnhvbbIdLfc" alt=""><figcaption><p>SkinTone overlay modes</p></figcaption></figure>

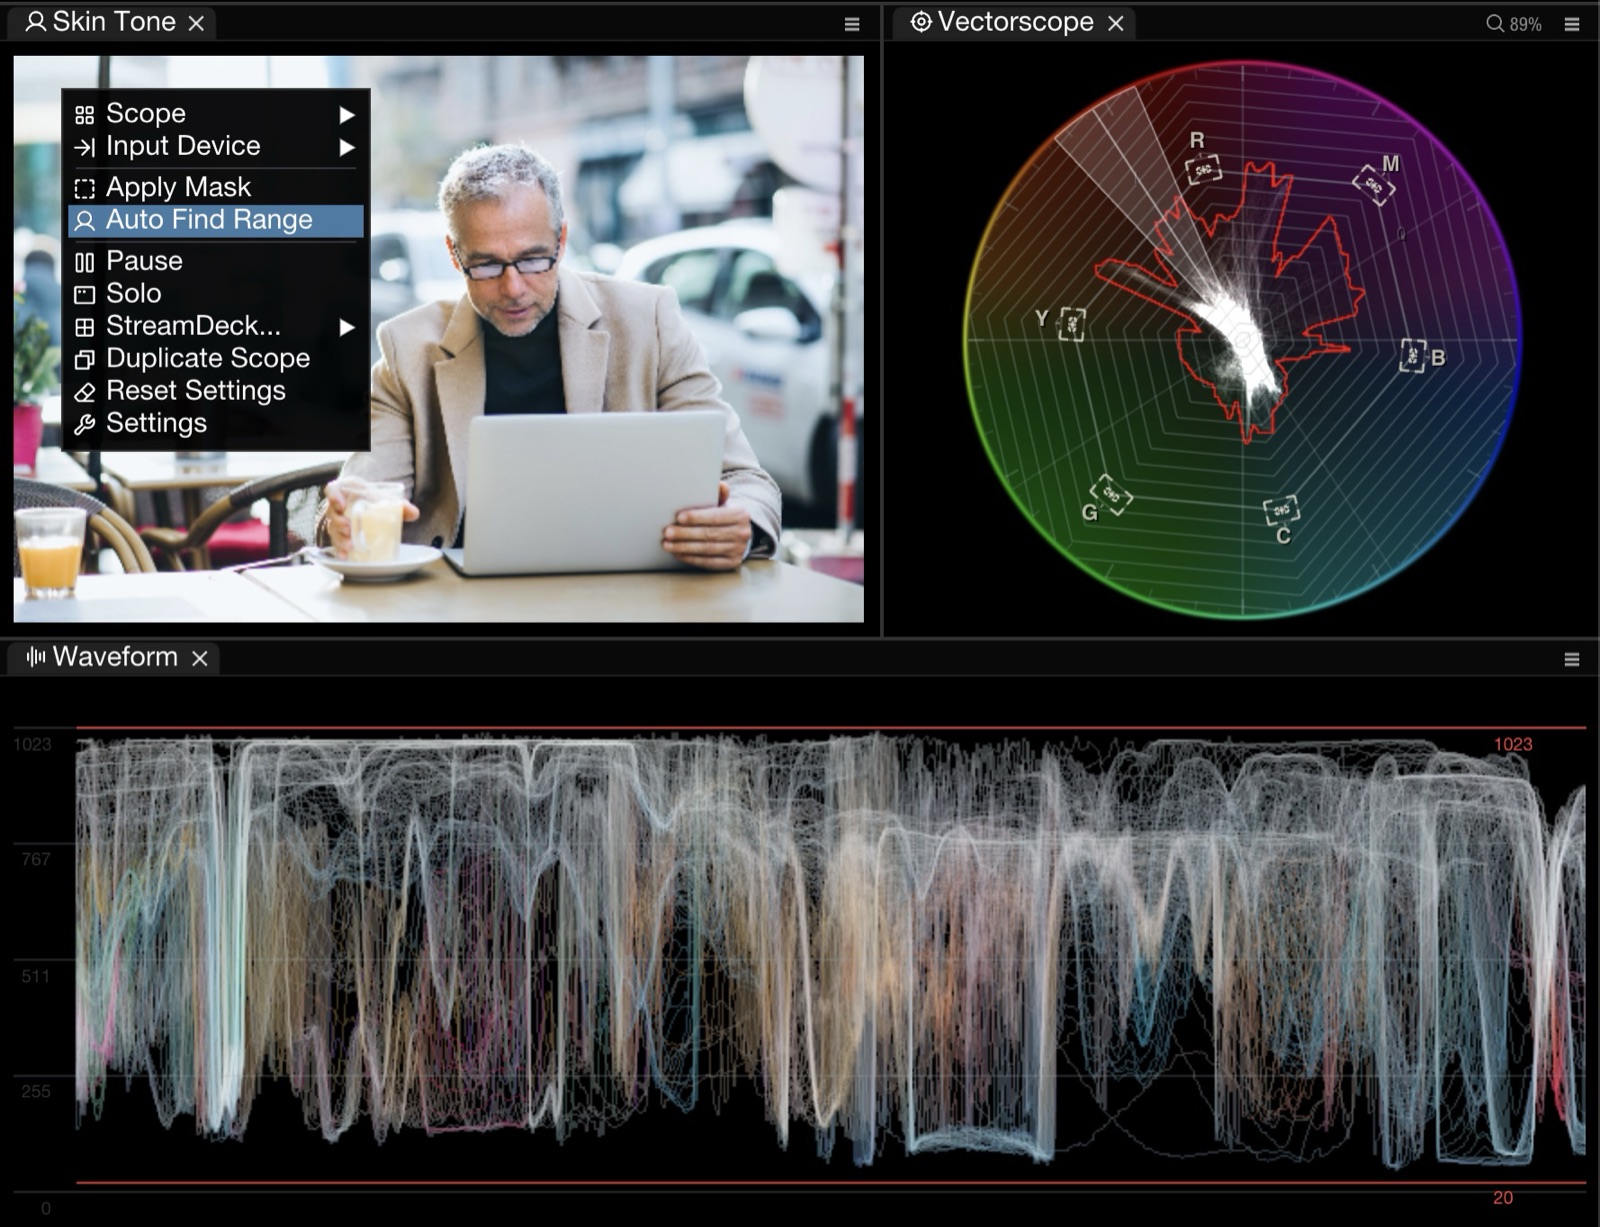
## Auto Find Range (1.11.50+)

**Auto Find Range** detects a face in the current frame and configures the SkinTone detection range automatically from that face's skin pixels — no manual slider tweaking required. One click sets both the HSV and Y'CbCr windows (hue, saturation/chroma, and luma) from what it measured.

You can trigger it three ways:

* From the **scope settings panel** (the *Auto Find Range* button).
* From the **scope context menu** (right-click the scope).
* From a custom **keyboard** or **Stream Deck** action (`SkinToneAutoFindRange`).

<figure><img src="/files/TbJdKciBbHvGxtjU2OKk" alt=""><figcaption><p>Auto Find Range in the scope context menu</p></figcaption></figure>

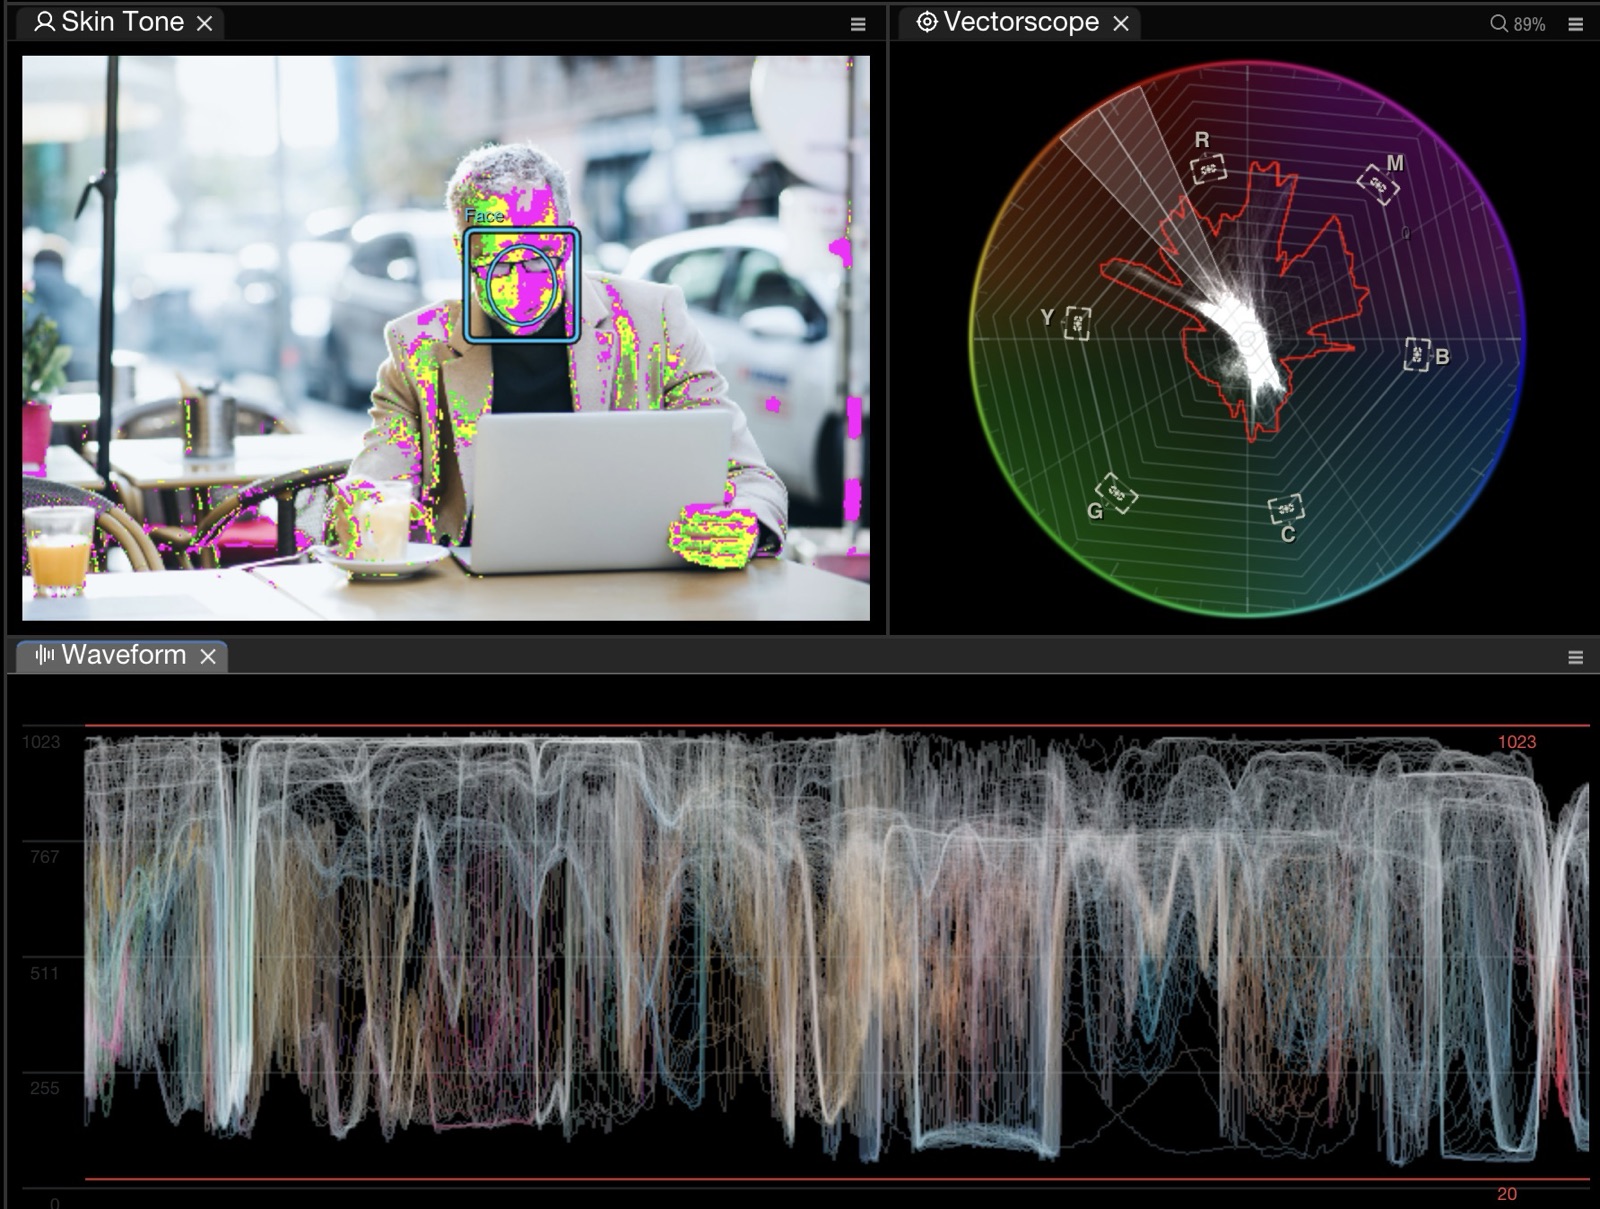
When it runs, a fading **cyan outline** (the detected face rectangle plus the sampled ellipse) confirms what was detected. The outline tracks zoom and pan so you can verify the pick.

<figure><img src="/files/RBB51lip2RNeUc3I3mo0" alt=""><figcaption><p>The detected face and the range derived from its skin tones</p></figcaption></figure>

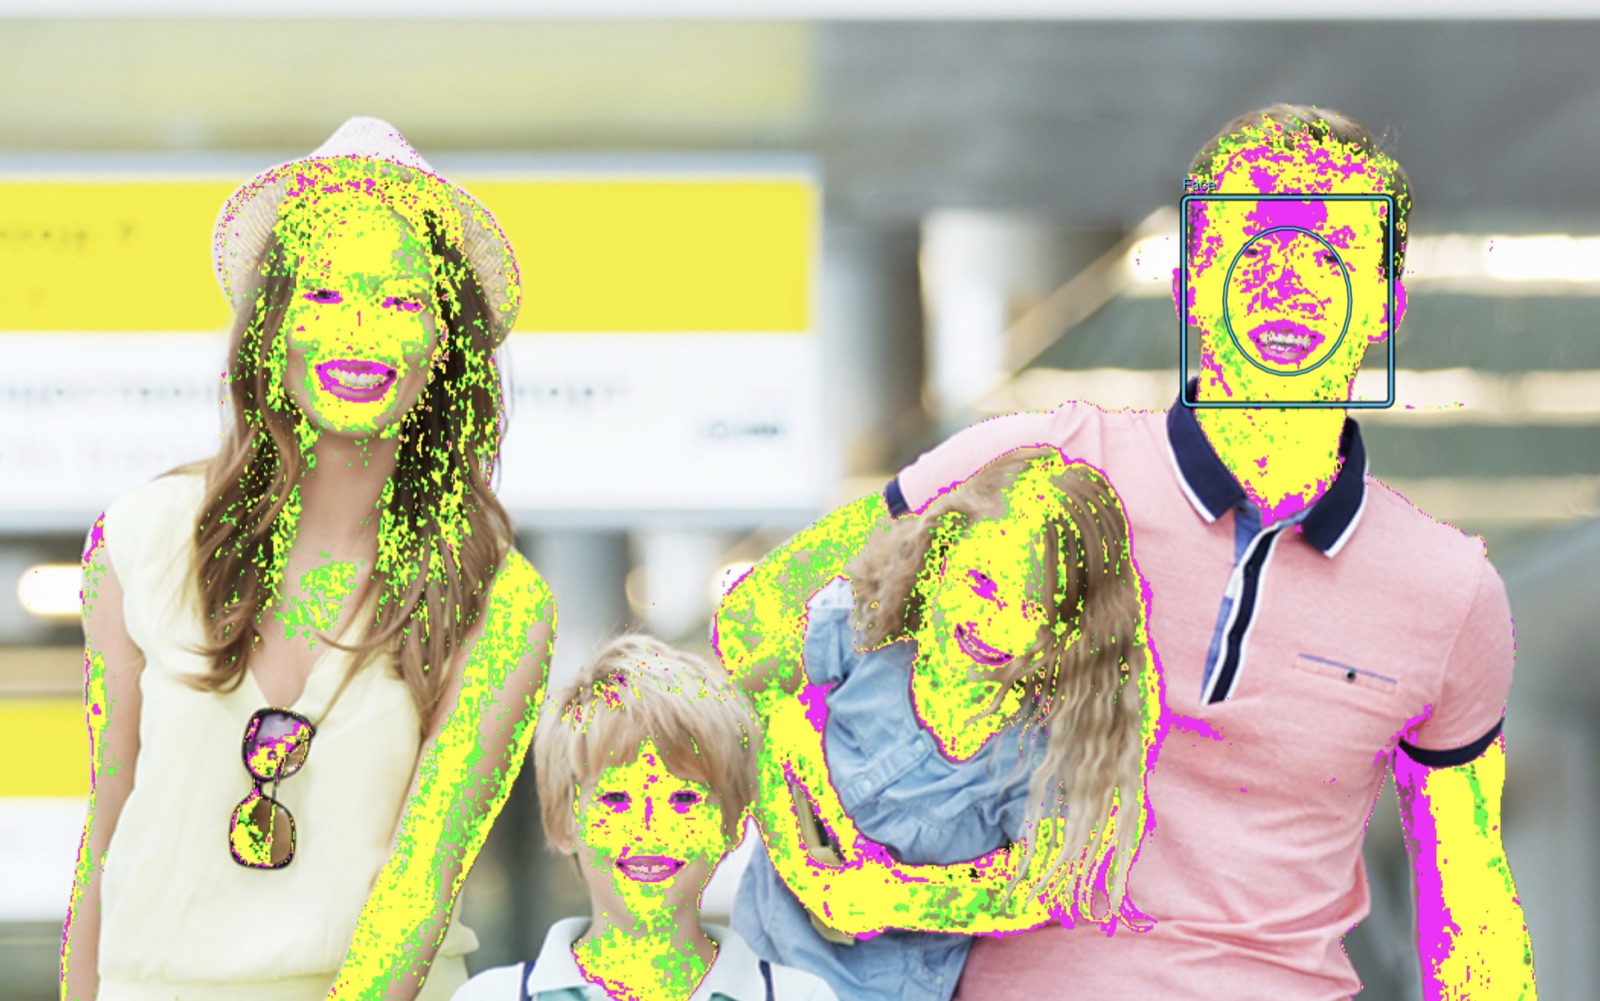
If several people are in frame, Auto Find Range picks the **largest face**. Candidates are tried largest-first and each must yield a valid skin-tone window, so detector false positives (e.g. foliage) are rejected in favor of a real face.

<figure><img src="/files/2xo2twrwBESa0x27XgZ6" alt=""><figcaption><p>With multiple faces, the largest one is used</p></figcaption></figure>

Face detection uses **Apple Vision** on macOS and a bundled detector on Windows, and runs on a worker thread so it never stalls the render loop.

## Wide Hue Range (1.11.50+)

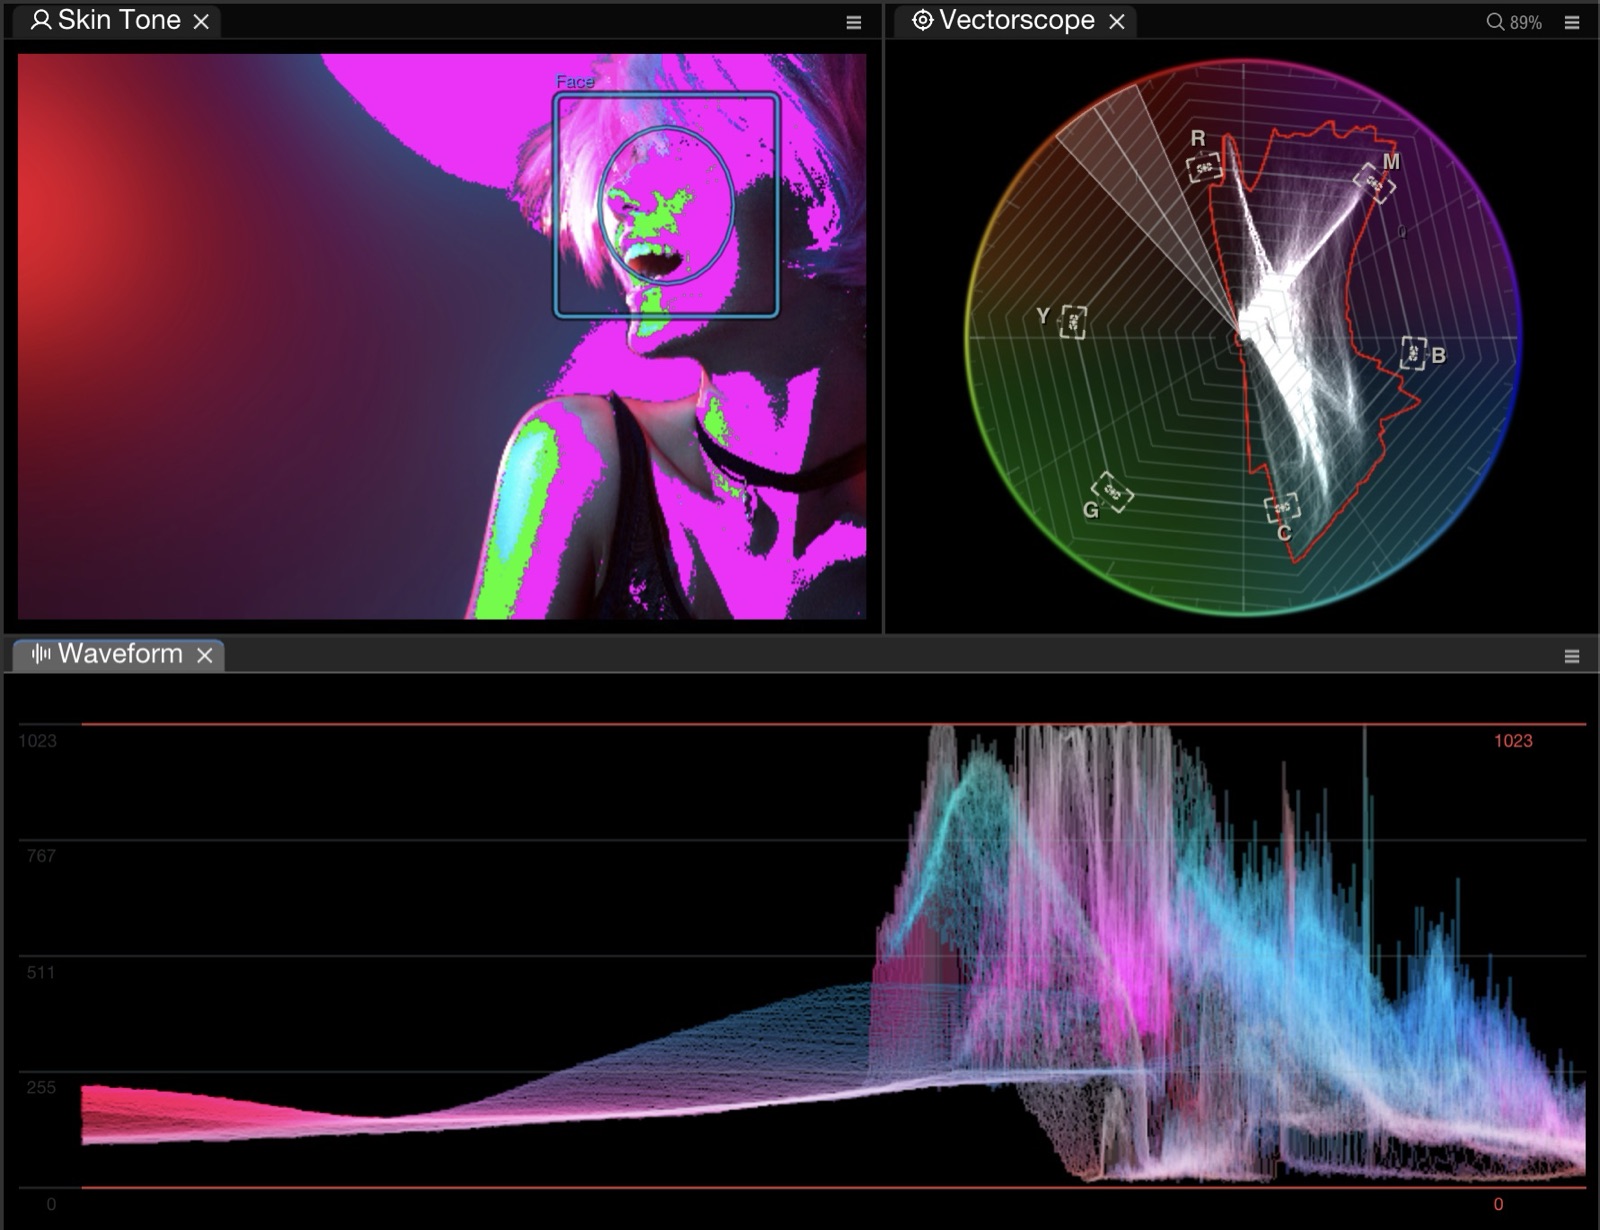
Heavily graded or stylized footage (for example a cold teal grade or neon lighting) can push skin chroma far outside the standard skin-tone hue band, leaving a face unselectable at any slider setting. **Wide hue range** maps the sliders across the full color wheel in both color models so those tones can be qualified.

Toggling it remaps the current sliders so your selected window stays in place. **Auto Find Range enables Wide hue range automatically** when the detected face's tones fall outside the standard windows — so on stylized shots a single click both finds the face and widens the range for you.

<figure><img src="/files/tBWGm4NHQmHw19td9rDq" alt=""><figcaption><p>Wide hue range qualifying skin under heavy neon grading</p></figcaption></figure>

## Features

* **Luma and Saturation Range** — Narrow the range for finer control over skin tones.
* **Skin Hue Guide** (1.11.50+) — The default overlay. Selected pixels are colored **yellow** when they sit within tolerance of the target skin-tone hue, **magenta** below it, and **green** above — a quick visual for how well skin aligns to the target. This is the overlay shown in the Auto Find Range examples above.
* **Overlay Modes** — Additional visualization options: grid, solid color, or a custom gradient between two selected colors.
* **Global Mask** — Apply the skin tone selection as a global mask so all scopes display only the skin tone areas from the active image.

<figure><img src="/files/5h2adrQvMZdlYvGWgjF8" alt=""><figcaption><p>Global mask applied to all scopes</p></figcaption></figure>

* **Low-Pass Filter** — Smooth out the selection for a more natural look.

Achromatic pixels such as pure greys, black, or white are excluded from SkinTone detection, so neutral highlights and shadows are not treated as skin.

## Presets (1.11.52+)

Save the current Skin Tone setup — detection range, filtering, overlay, and mask settings — as a named preset and recall it in any session. This is handy for switching between talent, lighting setups, or show-specific looks without re-tuning the sliders.

Presets are available from the **Presets** menu in the scope context menu, and from the **Presets** section of the scope settings window:

* **Save Current As...** — store the current settings under a name.
* Click a preset name to load it.
* **Delete Preset** — remove a saved preset.
* **Reload Presets** — rescan the preset folder, e.g. after copying preset files from another machine.

Saved presets are included in [configuration exports](/nobe-omniscope/layouts/backup-and-transfer.md), so they travel with your setup when you move to another workstation.

## 3-Color Mode with Sharp Transitions (1.10.139+)

Adds a three-color overlay mode with sharp transitions for quick pass/fail matching of skin tones.